Building a House
Construction StagesEssential
Steel Reinforcement Basics
Understand beam bars, slab steel, lap positions, and pre-casting checks before your roof concrete is poured.
10 min read· Last updated 12 Apr 2026
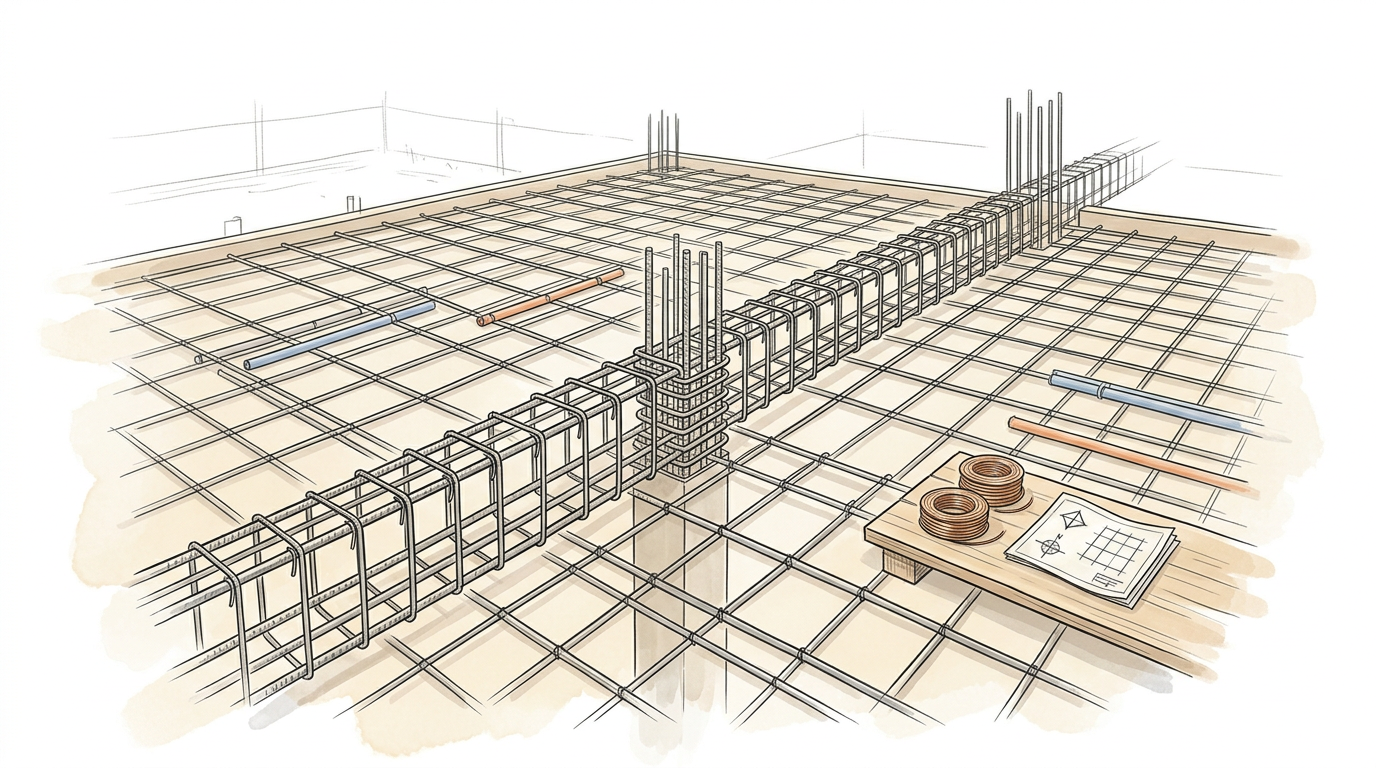
Why Steel Reinforcement at Slab Level Matters
In a house, the slab and the supporting beams work as one structural system. The slab spreads the load from rooms, furniture, water tanks, and people, while the beams collect that load and transfer it to columns. That is why the steel at this stage cannot be treated as a routine tying job. Once the concrete is poured, most mistakes become hidden, and corrections become expensive.
On many residential sites in India, the shuttering gets attention because it is visible, but the steel cage inside does not. That is risky. A slab may look flat from below even when the bar spacing is uneven, the cover is wrong, or the lap location is poor. In self-built homes in Lucknow, Jaipur, Indore, Hyderabad, or outer Bengaluru, these issues usually come from rushing the stage rather than from the original structural design.
Homeowners do not need to become structural engineers, but they should know the basic checkpoints before slab casting day. If the beam bars, stirrups, slab mesh, electrical conduits, fan hooks, and plumbing cutouts are not coordinated together, the site team will take shortcuts that weaken execution quality and create avoidable breaking later.
- Slab steel and beam steel must be checked together, not separately.
- Hidden reinforcement errors are much harder to fix than plaster or tile defects.
- Good steel placement improves crack control, durability, and load transfer.
- The casting day is only the final step; most quality is decided before concrete arrives.
Development Length at the Beam-Column Joint
The beam-column junction is one of the most important structural areas in a framed house. This is where the beam bars must enter and anchor properly into the supporting column zone. On site, people often say “the bar has gone inside, so it is fine,” but reinforcement does not work on guesswork. It needs sufficient anchorage length, commonly discussed as development length, so the steel can safely transfer stress into the concrete.
In practical residential work, the required length depends on bar diameter, steel grade, concrete grade, and structural design. A common site-level rule of thumb is that anchorage or development may fall in the range of about 40d to 50d, where d is the bar diameter, but the structural drawing should always control the final value. For example, a 12 mm bar may need several hundred millimetres of proper embedment, not a token bend near the column face.
This matters because the beam end is not a casual zone. It sees high force transfer, especially near supports. If the top and bottom bars are cut short, badly bent, or crowded without proper anchorage, the beam-column connection becomes weaker than intended. In earthquake-sensitive regions and expanding urban belts such as NCR, Dehradun, or Guwahati, careless junction detailing is an even bigger risk because load reversals and movement demand better structural continuity.
Tip:
Lap Splices: Where to Change Bars and Where Not To
Lap splicing is necessary on many residential sites because steel comes in fixed commercial lengths and beams or slabs often run longer than a single bar. The problem is not lapping itself. The problem is random lapping. If the contractor places all laps in one short zone, puts them right at a critical joint, or changes bars only for convenience, the section becomes congested and structurally less reliable.
In beams, lap positions should follow the engineer’s detailing and should stay away from the most stressed zone for that bar layer. On many simple residential spans, bottom bars are not usually lapped casually at midspan where tension demand can be high, and top bars should not be shifted thoughtlessly near the support zone. The exact location depends on whether the beam is simply supported, continuous, cantilevered, or part of a larger framed system. That is why the site should never use a single “one-size-fits-all” lap habit.
The same principle applies to slabs. Do not terminate or lap slab bars in a straight continuous line across the full panel unless the design specifically allows it. Staggered laps are safer and reduce weakness concentration. In practical terms, a homeowner should check that the steel fixer is not clustering every splice in one patch just because it is easier to tie there.
- Never place beam laps by convenience alone.
- Keep lap zones away from critical stress locations for that bar layer.
- Stagger splices instead of crowding them into one narrow section.
- Confirm that the structural drawing, not labour habit, decides the lap position.
- Recheck the lap area before shuttering is fully closed from the sides.
Stirrups, Slab Bars, and Tying Quality
Main bars carry major tension and compression, but stirrups and ties keep the beam cage behaving like a structural member instead of a loose bundle of steel. In residential RCC beams, closed stirrups with proper hooks, commonly 135-degree hooks where specified, are critical because they help resist shear, hold the main bars in position, and improve confinement near supports. If the stirrup hook is opened carelessly or the spacing changes randomly, the cage may look acceptable but perform poorly.
For slab reinforcement, the basics are just as important. The bar spacing should match the drawing, the mesh should stay reasonably straight, and cover blocks should keep the steel at the required height. A common site problem is that labour walks over the slab steel, electrical pipes are inserted later, and some bars get lifted or depressed without correction. This disturbs cover and can reduce the slab’s effective structural depth. In hot-weather cities such as Ahmedabad, Nagpur, or Raipur, crews often rush this stage before concrete trucks arrive, which makes disciplined checking even more important.
Tying quality also matters. The steel should be tied firmly enough that bar positions do not shift when people move, conduits are inserted, or concrete is vibrated. Loose intersections, missing chairs, broken cover blocks, and uneven bar levels are warning signs. Good slab steel should look organised, level, and intentional, not like a patchwork net held together at the last minute.
- Check that stirrup spacing is tighter near critical zones if the drawing demands it.
- Confirm closed stirrups and proper hook orientation.
- Make sure slab bars are not sagging or kicked upward after service work.
- Look for cover blocks, bar chairs, and tied intersections across the slab panel.
- Do not allow random bar cutting just to make room for conduits or sleeves.
Plan Electrical Conduits, Fan Hooks, and Plumbing Cutouts Before Casting
One of the biggest mistakes during slab reinforcement is treating services as an afterthought. Electrical conduits, switchboard routes, fan hooks, and plumbing sleeves should be planned before casting, not discovered after the slab has hardened. If the electrician arrives late or the plumbing route is not coordinated, workers end up forcing pipes through the steel, shifting bars, or breaking the slab later. That damages both quality and finish.
At slab stage, every room should already have a clear service plan. This includes where the fan point sits, where conduits rise for switchboards, where sleeves cross beams if permitted by design, and where shafts or openings are needed for plumbing lines. In an independent house in Pune, Hyderabad, or Noida, this planning is easier than in a builder flat because the owner controls the layout. But even then, many sites forget small but important items such as fan hooks, kitchen exhaust sleeves, or toilet vent cutouts until the last hour.
The correct approach is simple: structural steel first, service coordination next, then final clearance before pouring. The electrician, plumber, contractor, and site supervisor should all look at the same slab before approval. If a bathroom cutout, drain sleeve, or vertical pipe passage is missing, it is better to hold casting for an hour than to chip the slab later and reduce confidence in the member.
Warning:
Pre-Casting Checklist for Slab and Beam Reinforcement
Before the first batch of concrete is poured, the site should run one full inspection round. This is the stage where homeowners can add real value because the work is still visible. After concreting, the same bars, hooks, laps, and conduits will be buried permanently. A 20-minute review on casting morning can prevent months of rework, leakage chasing, and structural doubt later.
Use this checklist for a typical plotted house slab in India, whether it is a ground-floor roof, first-floor slab, or terrace slab. The exact engineering details may vary by city, soil condition, span, and future floor load, but the discipline of checking remains the same.
- Beam top and bottom bars are continuous and properly anchored at supports.
- Lap positions are staggered and not crowded into one critical zone.
- Stirrups are tied properly with the required hook detail.
- Slab bars match the spacing shown in the structural drawing.
- Cover blocks and bar chairs are visible and not broken.
- Electrical conduits are placed without cutting structural bars.
- Fan hooks are fixed at the required room locations.
- Plumbing sleeves, shafts, and slab cutouts are marked before pour.
- Beam and slab levels still look correct after all services are installed.
- The engineer or site supervisor has given final approval before casting.
- Ask for the structural drawing on site, not a verbal explanation.
- Walk every room and verify fan, light, and switch route planning.
- Check bathrooms, utility zones, and kitchen lines for sleeves or cutouts.
- Look closely at beam-column joints, not only the slab centre.
- Delay the pour if a major item is still unresolved.
Common Reinforcement Mistakes Homeowners Should Catch Early
Most slab and beam steel problems do not start as dramatic failures. They begin as small acts of convenience: bars lapped wherever space is available, stirrups opened for easy fixing, conduits pushed through without coordination, or cutouts left for “later.” The contractor may do this to save time, especially on fast-moving residential sites where shuttering rent, labour cost, and mixer timing create pressure. But convenience-based decisions at this stage stay inside the structure for the life of the house.
Another common mistake is assuming that if the concrete strength is good, the reinforcement arrangement matters less. That is false. Concrete quality and steel detailing work together. A good mix poured over badly placed bars does not produce a good structural member. Likewise, good steel cannot compensate for poor compaction or inadequate cover. The slab and beam stage must be supervised as a system, not as isolated materials.
For homeowners, the goal is simple: do not approve the pour just because the site looks busy and ready. Ask direct questions, insist on visible checks, and coordinate structure with services before the concrete truck starts discharging. That one habit separates disciplined house construction from the kind of site execution that causes hidden regret later.