Building a House
Construction StagesEssential
Staircase Casting & Finishing
Get the shuttering, concrete pour, curing, and surface readiness right so your RCC staircase stays safe and finishes cleanly.
10 min read· Last updated 12 Apr 2026
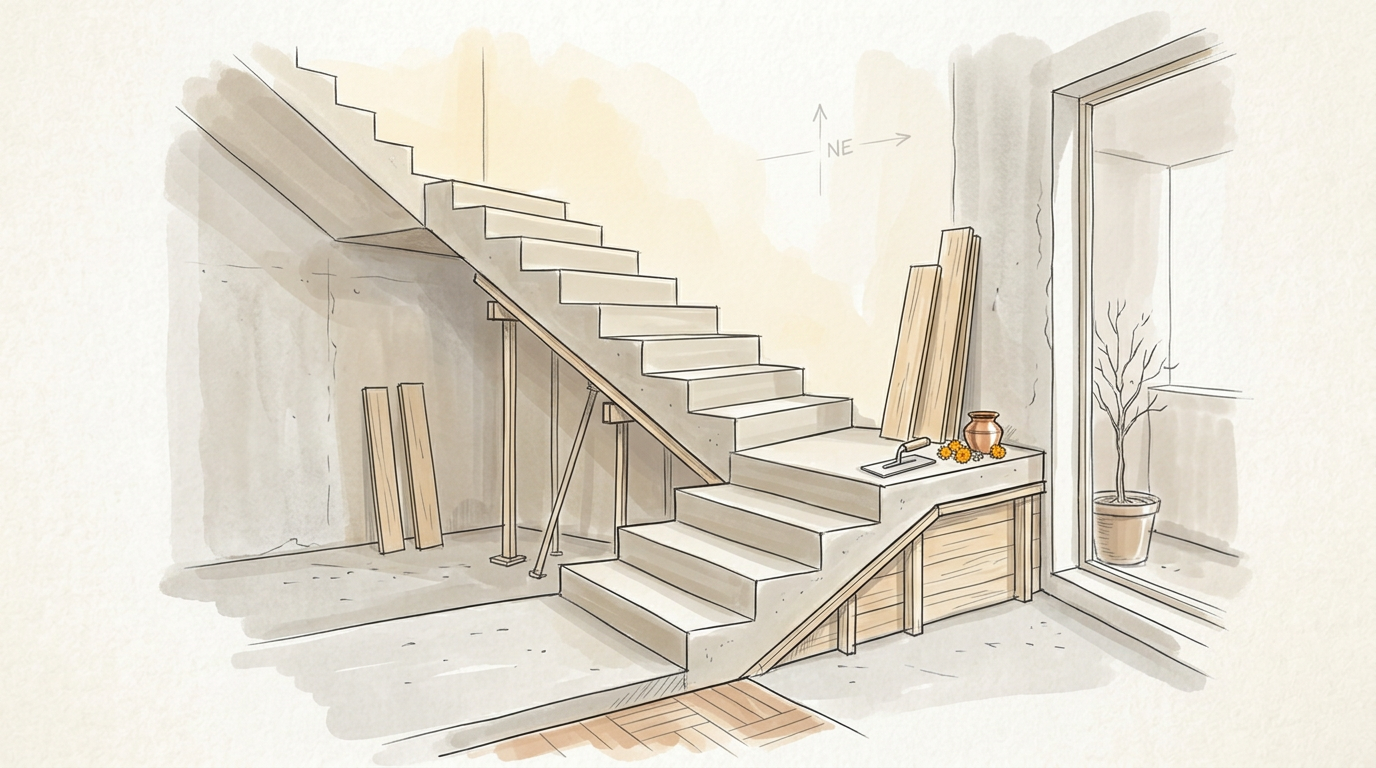
Why Staircase Casting Needs More Precision Than a Normal Slab
Staircase casting looks like a small part of house construction, but on site it is one of the trickiest structural jobs. A slab is usually flat and repetitive. A staircase is not. It has slope, risers, treads, landing levels, edge lines, and tight shuttering geometry. If even one of these shifts slightly during staging or concrete pouring, the final steps may become uneven, uncomfortable, or difficult to finish properly.
This is why staircase casting should never be treated as routine formwork plus concrete. In plotted homes across Lucknow, Jaipur, Patna, Indore, and Hyderabad, problems often begin when contractors rush the support system or start pouring before all step dimensions are rechecked. Once concrete sets, errors in the flight line or landing level are much harder to repair than ordinary wall-work mistakes.
The good news is that most staircase issues are preventable. If the brick support, staging, shuttering, and pouring sequence are handled carefully, the staircase becomes easier to finish later with plaster, stone, tile, or granite. This stage is therefore not just about structural casting. It also decides how cleanly the staircase can move into finishing work.
- Treat staircase casting as a high-precision structural stage.
- Check slope, landing, tread, and riser together instead of separately.
- Avoid site improvisation once shuttering starts.
- Link casting quality directly to future finishing quality.
- Give staircase work more supervision than a normal flat slab pour.
How to Prepare Staircase Staging and Shuttering Correctly
The first practical rule is to prepare the support before thinking about the concrete pour. Staircase staging should carry the weight of shuttering, labour movement, wet concrete, and vibration without shifting. On many residential sites, the lower support begins with brickwork below the future flight and below the landing rest area. This is done so the staircase does not depend only on temporary props in awkward positions.
Mid-landing preparation is especially important. If the landing is assumed wrongly, the flight geometry changes and the last few steps stop matching the intended riser and tread size. The transcript guidance makes this clear: many site mistakes happen because workers measure the landing casually, then the staircase loses proper step balance. That is why the support for the flight and the support for the landing should be checked against the actual drawing before the shutter boards are fixed.
The staging itself may use MS pipes, ballies, timber, or another site-approved support arrangement, but the principle stays the same. Every support line should hold the slope firmly and account for the staircase waist thickness, not just the visible step profile.
- Build the support system before treating the staircase like a normal concreting task.
- Check where the flight rests and where the landing rests.
- Include waist slab thickness while fixing the underside staging line.
- Use stable supports that can carry wet concrete and worker load safely.
- Recheck the full slope before fixing the final shutter boards.
Tip:
Lock the Step Geometry Before Any Concrete Reaches the Stair
Good staircase casting starts with equal steps. The visible comfort of the staircase comes from riser and tread consistency, not from how smooth the final tile or stone looks. If the shuttering is fixed with one step slightly deeper, another slightly higher, or the landing level slightly off, the staircase may still appear acceptable from a distance but will feel wrong every day in actual use.
The practical staircase references in this project point toward residential proportions such as roughly 6-inch risers and about 10-inch treads in many house cases, with a flight thickness often around 6 inches depending on design. In execution terms, the exact numbers matter less than one core rule: every step should remain consistent throughout the flight.
This is where homeowners should insist on marking and verification before the pour begins. Measure the stair count. Confirm the landing width. Check the full rise. Check the tread run. Then see whether the shutter boards actually reflect those numbers. In compact urban homes in Bengaluru, Noida, Surat, and Nagpur, staircase areas are often tight, so even a small geometry error becomes more noticeable than it would in a larger home.
- Lock riser and tread sizes before pouring day.
- Keep all steps equal instead of correcting the last steps by guesswork.
- Match shuttering to measured geometry, not memory.
- Check landing width and landing level with the same care as the steps.
- Verify the stair run physically once before calling for concrete.
How to Pour Concrete on a Staircase Without Losing the Shape
Concrete pouring is the most delicate part of the staircase job because the member is sloped. If the mix is too wet, the concrete tends to move downward. If workers pour too aggressively from the top, the lower portion may get overloaded, the mix may flow unevenly, and the step profiles may start losing sharpness. This is why staircase pouring requires more control than a flat slab.
The source guidance strongly favours manual mixing or a controlled manual placing method for staircase concrete, especially in smaller residential work where accuracy matters more than speed. The reason is practical. Manual placement lets the team pour step by step instead of dumping too much concrete at once. This controlled method reduces the chance of slurry running down the flight and makes it easier to maintain the tread and riser shape.
Pouring should generally proceed in sequence rather than randomly. A team should work along the staircase carefully, filling and compacting with attention to each step zone. If the concrete appears to be slipping or bulging, the site should slow down immediately instead of trying to recover the shape after the whole flight is flooded. In staircase work, correction becomes harder the more concrete has already been placed.
Warning:
- Use a controlled placement method instead of rushing the pour.
- Prefer a low-workability but workable mix rather than a loose flowing mix.
- Pour in sequence so each step profile stays under control.
- Stop immediately if the concrete begins sliding or distorting the shutter profile.
- Prioritize shape stability over speed.
Vibration, Surface Control, and Making the Stair Ready for Finishing
Compaction is necessary, but staircase concrete should be vibrated carefully. The guidance from the source material points toward using a smaller needle vibrator, around 25 mm rather than a heavier 40 mm needle, because an oversized vibrator can disturb the concrete mass more aggressively in a tight sloping section. On a staircase, too much vibration can encourage the concrete to move downward and ruin the step shape the shuttering was supposed to protect.
The team should also keep checking that supports have not shifted during compaction. Staircase shuttering is vulnerable not only because of the slope, but also because workers tend to stand on the step zones during pouring. If the supports are weak or the shuttering was not braced well, this movement can show up immediately as sagging, bulging, or uneven edges. Once that happens, the staircase becomes harder to finish cleanly with plaster, stone, or tile.
Finishing readiness begins during casting, not after it. A staircase that is compacted properly, kept geometrically stable, and finished with a reasonably even top surface will need much less correction later. In residential projects in Ahmedabad, Pune, Chennai, and Kochi, cleaner concrete staircases save money because the finishing contractor can start with a truer base.
- Use controlled vibration and avoid over-vibrating a sloped staircase.
- Prefer a smaller needle vibrator where the geometry is tight.
- Watch for movement in props, boards, and step nosing during compaction.
- Aim for an even, stable concrete profile so finishing stays lighter later.
- Remember that finishing quality depends heavily on casting discipline.
Curing, De-Shuttering, and the Right Time to Start Staircase Finishing
After the pour, curing becomes the next non-negotiable step. Like any RCC member, the staircase needs moisture retention so the concrete can gain strength properly. The related project guidance on de-shuttering already shows the larger principle: concrete strength, curing quality, and timing matter more than labour convenience. For a staircase, that lesson is especially important because edges and step corners are exposed and vulnerable to damage.
De-shuttering should therefore follow a conservative approach. Side and profile elements may become removable earlier than the full support system, but the staircase should not be treated as ready for use just because the concrete looks hard. It still needs curing, protected movement, and careful removal of supports according to the site engineer’s decision and the broader concrete-strength timeline being followed on the project. If the contractor strips supports early only to reuse material elsewhere, the owner should intervene.
Finishing work should begin only after three things are true: the concrete has gained enough strength, the step geometry is confirmed, and any surface defects have been identified honestly. This is the stage to decide whether the staircase will receive plain cement finish, plaster correction, Kota stone, granite, or tile. Starting finishing too early can damage edges. Starting without checking alignment can lock in bad geometry permanently.
Use this checklist before calling the staircase ready for finishing:
- All steps have been checked for equal rise and tread after casting.
- No major sagging, shifting, or edge distortion is visible.
- Curing has started properly and continued consistently.
- De-shuttering is being done in a controlled sequence, not in a rush.
- Supports are not being removed only for shuttering reuse pressure.
- Surface defects, honeycombing, or rough zones are identified before finish material is selected.
- The engineer or supervisor is satisfied that the staircase is stable for the next stage.
- Start curing as soon as the concrete is ready to receive it safely.
- Do not rush de-shuttering only because the staircase “looks set.”
- Keep edge protection in mind because tread corners chip easily.
- Inspect the cast profile before choosing the finishing thickness.
- Begin stone, tile, or plaster correction only after the staircase is structurally ready.
Common Staircase Casting Mistakes That Create Finishing Problems Later
The first major mistake is wrong landing and step measurement during staging. This is where uneven steps begin. The second is poor support below the flight, especially when the waist thickness is ignored in staging calculations. The third is using a very wet mix or rushing the pour from one side, which causes the concrete to travel downward and deform the step shape.
The next mistake is over-vibration or careless worker movement during the pour. On a staircase, a small disturbance can affect several steps at once. Another frequent site problem is assuming the staircase can be corrected later with extra mortar or tile adhesive. Heavy correction layers often hide geometry issues instead of solving them.
Homeowners should also be alert to the finishing-stage trap: covering defects before understanding them. If there is honeycombing, step mismatch, or sagging, it should be inspected structurally first. In self-built houses across tier-2 and tier-3 cities, this is often where avoidable money gets spent twice, once on bad execution and again on cosmetic correction.
- Do not allow landing errors to be “adjusted later.”
- Do not ignore waist thickness while staging the flight.
- Do not use loose concrete just to make placement faster.
- Do not rely on heavy finishing layers to fix casting mistakes.
- Do not begin surface finishing until the structural profile is checked honestly.
- Ask for supervisor or engineer review if step consistency looks doubtful.