Building a House
Construction StagesEssential
Electrical Conduits in Slab & Walls
Plan slab and wall conduit routes correctly so your home wiring stays safe, serviceable, and free from expensive rework.
10 min read· Last updated 12 Apr 2026
Why Conduit Planning Must Start Before Wiring
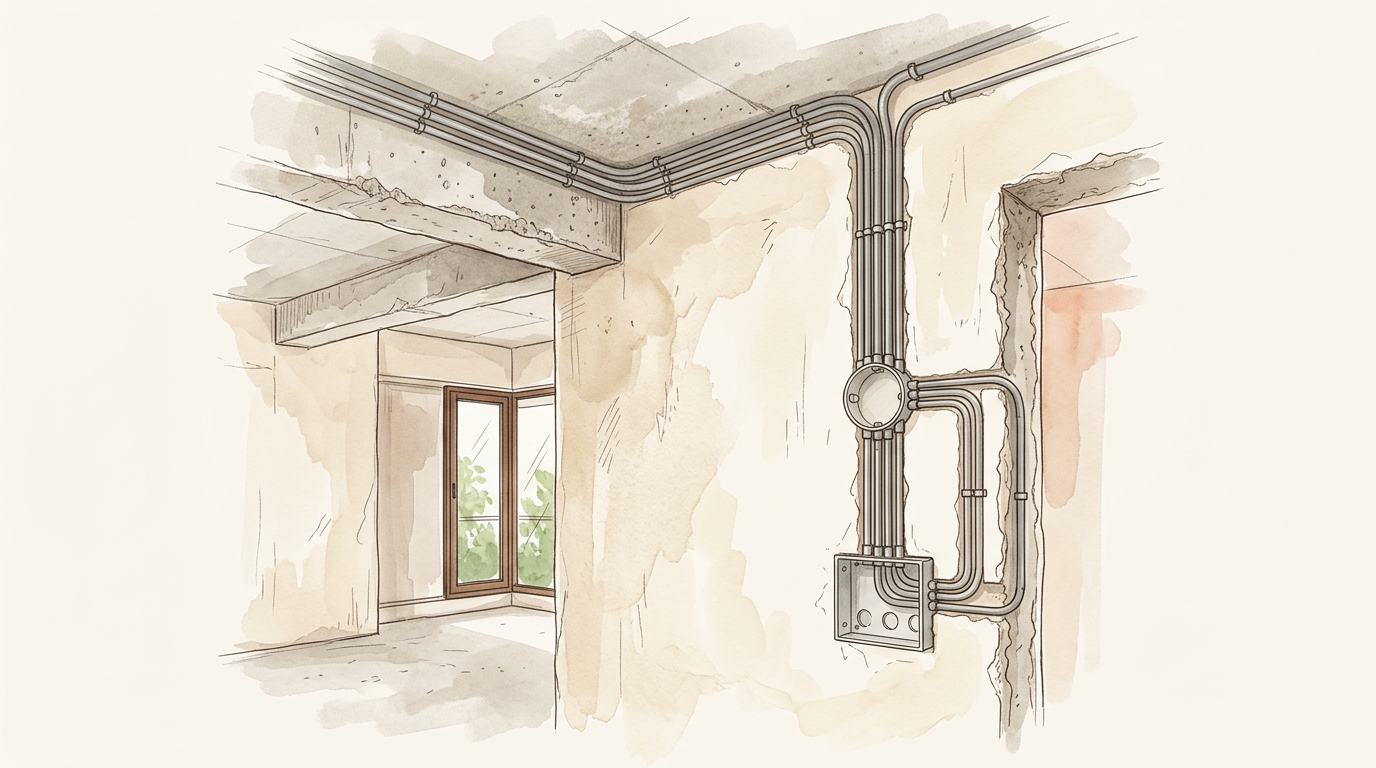
Electrical conduits are the hidden routes that carry wiring safely through a house. In Indian home construction, these conduits are usually concealed inside slabs, beams, and masonry walls so the final finish looks clean and modern. But concealed work has one big rule: once concrete is poured or plaster is completed, mistakes become expensive. That is why conduit planning cannot be treated as a last-minute electrician task.
In most plotted houses across Lucknow, Hyderabad, Jaipur, Pune, and Bengaluru, slab conduits are fixed before concrete casting and wall conduits are fixed before plaster. The sequence matters because slab conduits control ceiling points such as fans and lights, while wall conduits control switch boards, socket points, and wall drops. If the routing is casual, the owner may later face jammed pipes, broken plaster, misaligned switch boards, or wires that cannot be replaced.
This stage should always be coordinated with the site engineer, electrician, bar-bending team, and masonry team:
- Decide fan, light, and switch-board points before slab casting starts.
- Mark wall drop locations before brickwork and plaster move too far ahead.
- Match conduit size to the number of wires and future maintenance needs.
- Keep routes practical around beams, columns, and openings.
- Check every junction, box, and bend before the work gets covered permanently.
How to Lay Concealed Conduits in the Slab Properly
Slab conduit work is mainly about ceiling points. This includes fan points, light points, and the pipe routes that later come down into walls through planned wall drops. At this stage, the conduit is usually tied above the slab reinforcement as per the structural layout and electrical point drawing. The main objective is simple: the conduit should stay fixed in position during casting and remain clear after concrete hardens.
PVC conduit is commonly used in residential construction, but the diameter should not be chosen blindly. For ordinary lighting and fan circuits, many site teams use 20 mm conduit. Where more wires are expected or future pulling may be tight, 25 mm is often safer. The point is not only to pass the first set of wires, but to keep the route serviceable later. If the pipe is too small or too crowded, rewiring becomes very difficult.
When laying slab conduits, keep these working rules in mind:
- Place junction boxes close to the exact fan or light point, especially at room centers where ceiling fans are planned.
- Tie the conduit firmly to reinforcement so it does not shift when labour walks over the slab or when concrete is vibrated.
- Keep bend count as low as possible because sharp or repeated turns make wire pulling harder.
- Plan wall drops from logical beam or edge locations so the conduit can later come down cleanly into the switch-board zone.
- Use separate thinking for electrical, telephone, internet, or TV lines if those services are being concealed together.
Junction Boxes, Wall Drops, and Routing Around Beams
Many slab conduit failures happen not because the pipe quality is poor, but because the routing is poorly thought out. Ceiling points need more than a pipe placed somewhere in the slab. They need a coordinated path from the distribution point to the ceiling box, then onward to the wall drop, and finally down to the switch board or power point. If this path ignores beams or structural members, the electrician may be forced into awkward detours later.
Fan points need special attention. In a typical bedroom or living room, the fan hook is placed at the center of the slab, and the junction box should be fixed close to that location. Light points should also be aligned with the intended room layout instead of being adjusted casually on site. For large living rooms in cities like Ahmedabad, Noida, and Indore, where false ceiling or decorative lighting may be added later, keeping conduit paths neat and documented becomes even more useful.
A few practical site precautions make a major difference:
- Do not drop conduits randomly from the slab wherever it feels convenient.
- Coordinate wall drops with the final switch-board position before concrete is poured.
- Avoid routes that cross structural congestion without need.
- Keep pipe runs straight and understandable instead of zig-zagging around the slab.
- If different services are being concealed, use a simple color distinction or marking method so identification is easier later.
What Must Be Checked Before and After Slab Casting
The inspection before concrete pouring is one of the most important checkpoints in electrical rough-in work. The site team should not assume that the conduit layout is correct just because pipes are visible. Every pipe run, junction, bend, and box opening should be checked physically. This is the stage to confirm that no pipe has been damaged by reinforcement work and no joint has loosened while the slab steel was being tied.
Every joint should be tight enough to resist slurry entry during casting. Where required, the openings should be sealed properly so concrete water does not enter the line. This is especially important in self-construction projects where multiple trades overlap and nobody is watching the conduit continuously. In fast-moving sites in Patna, Ranchi, Chennai outskirts, and Tier-2 townships, blocked slab conduits are usually caused by exactly this kind of missed pre-pour checking.
Use this slab-stage checklist before approving concrete work:
- All slab conduits are fixed firmly and do not move under hand pressure.
- No pipe is cracked, pinched, or broken by reinforcement work.
- Junction boxes are placed at correct fan and light locations.
- Wall drop routes are aligned with the planned board positions.
- All conduit joints are tight and protected against slurry entry.
- No route is overcrowded with too many future wires.
- Pipe openings are sealed or protected until the next stage.
After de-shuttering, a practical follow-up step is to pass a GI wire or fish wire through the conduit. This is a simple but very useful test. It confirms whether the route is actually open and helps identify blockage before finishing work begins. If the pull wire does not pass easily, fix the problem immediately while access is still easier.
How Wall Conduits Should Be Installed Before Plaster
Wall conduit work begins after masonry is ready but before plastering. This timing is critical. In proper residential execution, the wall is chased first, boxes are fixed, conduits are clipped in position, and then the chased portion is repaired before plaster finishes the surface. Cutting the wall after plaster simply to insert conduit is poor practice because it weakens the finish and often causes recurring cracks around the repaired area.
The chase itself should be neat and sized only as much as required. The standard site method is to cut the wall along the marked route, remove the inner strip, place the PVC conduit, and fix it with clips or binding support so it cannot shift while wire pulling happens later. Modular switch boxes, junction boxes, and socket boxes should be fixed at the same stage so the line and level stay correct across the room.
Wall conduits should follow a disciplined layout:
- Keep all conduit paths vertical or horizontal, never diagonal.
- Fix switch-board heights according to actual room use before boxes are installed.
- Use proper support clips or tied fixing so the pipe stays stable during repair mortar work.
- Fill the chased section properly and use wire mesh where needed to reduce plaster cracking.
- Pull wires only after plaster and related wet work are complete, not during rough conduit fixing.
This matters even more in kitchens, bedrooms, and TV walls where multiple points get grouped together. If the pipe layout is confusing behind the wall, future drilling, furniture fixing, or repair work becomes risky. A straight vertical and horizontal routing pattern makes maintenance far easier for the owner and electrician later.
Common Wall-Conduit Mistakes and How to Avoid Them
The most common wall mistake is starting conduit work too late. Once plaster starts, the site loses flexibility. Another frequent issue is poor box alignment. If modular boxes are not fixed level and at the right depth, the final switch plates never sit cleanly. Homeowners often notice this only during finishing, but the real cause is rough conduit work done in a hurry. Similar problems happen when the chase is shallow, when conduit is loosely packed, or when repair mortar is not reinforced properly.
Horizontal and vertical discipline is equally important. Some labour teams run conduits diagonally to reach points faster. That may save time during rough work, but it creates confusion later. If the owner drills for a wall frame, cabinet, or TV mount, a diagonal hidden line is much harder to predict. Straight routing is not only cleaner engineering, it is a practical safety measure for the years ahead.
Watch for these red flags during wall conduit installation:
- Conduit cutting begins after plaster instead of before it.
- Pipes are laid diagonally between switch boards and ceiling drops.
- Boxes are fixed without checking height, level, or final finished wall thickness.
- Chased areas are filled casually without mesh or proper bonding.
- Wires are pulled before plaster, putty, or wet finishing work is completed.
- Too many points are forced into one small conduit just to reduce material use.
For Indian homes with evolving needs, it is also smart to reserve paths for internet cable, inverter provision, TV points, doorbell cable, and future AC points. In cities such as Gurugram, Surat, Kochi, and Nagpur, homeowners often upgrade appliances within a few years of moving in. A slightly better conduit plan at construction stage protects the house from repeated wall cutting later.
A Practical Sequence for Safe and Serviceable Conduit Work
The best conduit work follows a simple sequence: mark the points, fix slab conduits before casting, test them after de-shuttering, chase the walls before plaster, install boxes and wall conduits in line and level, repair the chased surface, and pull wires only after wet finishing stages are complete. This sequence sounds basic, but most long-term electrical problems in self-built houses come from skipping one of these steps or mixing the order for speed.
Think of slab conduits and wall conduits as one connected system, not two isolated tasks. A ceiling fan point is useful only if the junction box is correct, the slab conduit stays open, the wall drop is positioned properly, and the switch board below is aligned with the final room layout. The same logic applies to lights, sockets, and utility points. Good concealed work is invisible when done well, but the planning behind it is highly deliberate.
Use this practical execution order on site:
- Freeze room-wise point locations before slab or plaster work begins.
- Install and secure slab conduits with all boxes and wall drops before casting.
- Inspect every pipe, joint, and opening before concrete pouring.
- Test conduit openness after de-shuttering with GI wire or pull wire.
- Chase masonry walls and install vertical and horizontal conduits before plaster.
- Fix boxes accurately, repair the wall properly, and add mesh where required.
- Pull wires only after plaster and other wet works are fully complete.