Building a House
Construction StagesEssential
Bathroom Sanitary Fittings Guide
Choose the right bathroom fixtures, accessories, and fitting sequence so the space stays leak-free, easy to maintain, and comfortable for daily use.
10 min read· Last updated 12 Apr 2026
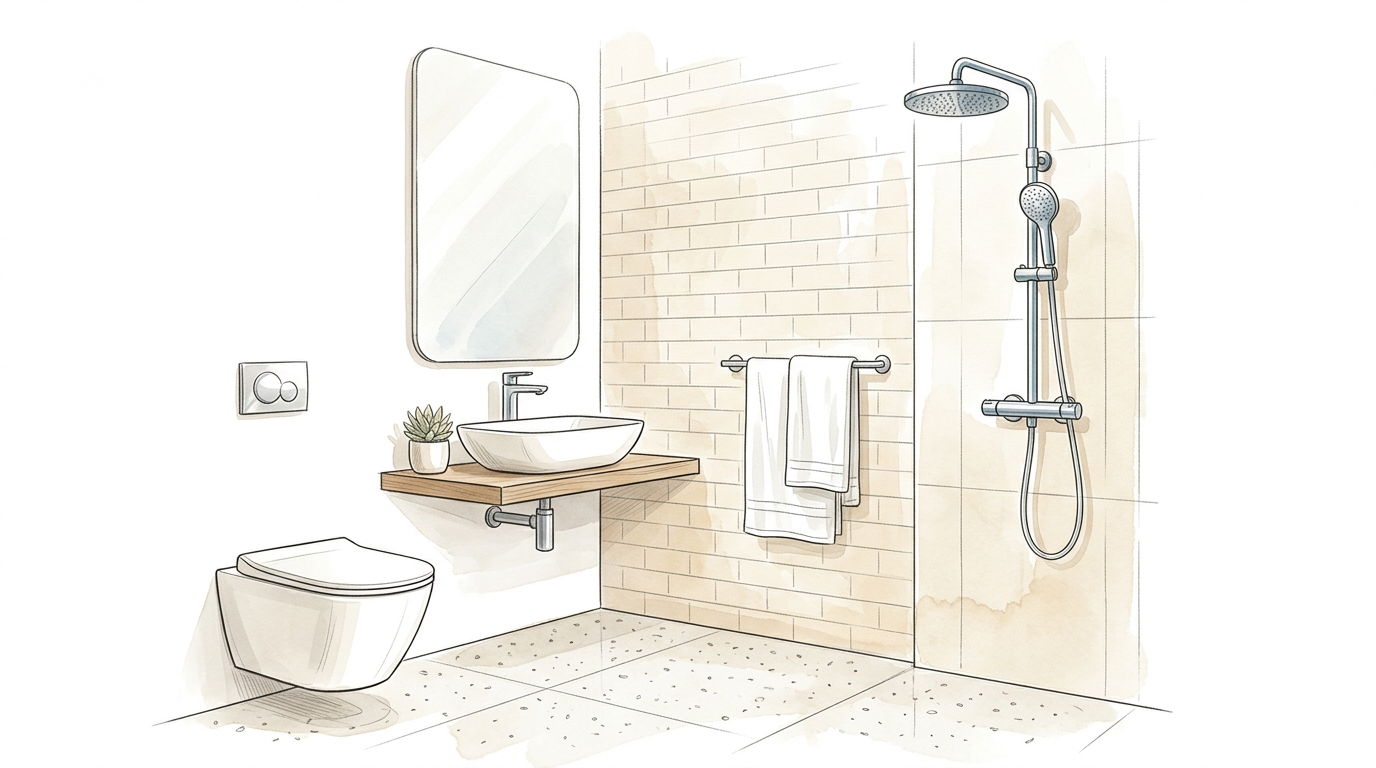
What Bathroom Sanitary Fittings Actually Include
Bathroom sanitary fittings are the final functional items that turn a tiled room into a usable bathroom. In an Indian house project, this stage usually includes the WC or commode, flush system, jet spray or health faucet, wash basin, basin mixer or pillar tap, shower set, angle valves, floor drain covers, mirror, towel fittings, soap holder, and sometimes a geyser connection. Many homeowners treat this as a cosmetic step, but it affects water use, comfort, maintenance, and leakage risk every single day.
This work starts only after concealed plumbing lines are already tested, wall and floor tiling is complete, and major civil finishing is done. If fittings are installed too early, they can get damaged during remaining site work. If they are installed too late without proper planning, point positions may not align well with the basin, commode, or shower layout. In cities like Lucknow, Hyderabad, Pune, and Jaipur, this is one of the most visible finishing stages, so poor decisions here stand out immediately.
Before fitting starts, make sure the bathroom plan is clear:
- Confirm whether the toilet is Indian, floor-mounted western, or wall-hung western.
- Check wash basin size, height, and wall position before fixing the tap set.
- Match tap, shower, and health faucet points with the concealed plumbing outlets.
- Decide accessory positions early so tiles do not get damaged by repeated drilling.
- Keep ventilation, exhaust, and geyser provision in the same planning discussion.
When Bathroom Fitting Work Should Begin
Bathroom fitting should begin only after the rough plumbing work is complete and all concealed lines have been pressure-tested. The finished tile surface should be cleaned, outlet caps on plumbing lines should be opened carefully, and each hot-water and cold-water point should be checked one by one. This is important because once commodes, basins, mirrors, and accessories are fixed, repairing a hidden leakage becomes more difficult and more expensive.
In practical house construction, the fitting stage usually comes after wall plaster, waterproofing, tiling, and painting around wet areas are sufficiently complete. If the bathroom still has pending hacking, drilling, or heavy labour movement, expensive fittings may chip or crack. On self-built homes in Patna, Indore, Ahmedabad, and Bengaluru outskirts, a common mistake is rushing the sanitary fitting because the family wants a “finished look” before the site is truly ready.
Use this sequence before final installation:
- Open all concealed plumbing outlets and clean thread ends properly.
- Test water flow, drain flow, and trap alignment before fixing fixtures.
- Check slope toward floor drain so water does not collect near the WC or basin.
- Confirm tile joints, corner finishing, and silicone-ready edges are complete.
- Fit large items first, such as commode and basin, before smaller accessories.
How to Choose the Main Fixtures for Daily Use
The first big decision is the WC. In Indian homes, the choice is usually between an Indian pan, a floor-mounted western commode, and a wall-hung western commode. Floor-mounted western toilets are common in plotted houses because they are practical and easier for local plumbers to install. Wall-hung models look cleaner and make floor cleaning easier, but they need the right concealed cistern system, proper wall support, and careful installation. If the bathroom is compact, the projection of the commode and the door swing should also be checked before finalizing the model.
The second major decision is the wash basin and its faucet setup. A pedestal basin, wall-hung basin, or counter basin should be selected based on bathroom size, storage needs, and the pipe point already given in the wall. In many middle-income Indian homes, a compact wall-hung basin works well for secondary bathrooms, while a wider basin with a mirror cabinet suits the common or master bathroom. The tap should match both water pressure and the basin hole pattern. A basin mixer looks cleaner, but a simple pillar cock may be easier to maintain in lower-budget builds.
The shower and flushing set also deserve attention because they affect daily comfort more than decorative items do. A basic shower arm and head may be enough in a budget bathroom, while a wall mixer with overhead shower and hand shower suits a more finished layout. Alongside that, most western WC bathrooms now use a health faucet or jet spray, while Indian toilet layouts often still use a bib tap plus hose arrangement. The goal is not to copy a showroom setup, but to choose fittings that match actual use, water pressure, and maintenance ability.
Keep these selection rules in mind:
- Choose the WC type based on space, plumbing point, cleaning ease, and user comfort.
- Match basin size to bathroom width so movement around the door remains comfortable.
- Use shower and tap models that suit the available water pressure on site.
- Prefer fixtures with commonly available spare parts in your city or town.
- Check whether the geyser line or hot-water point is planned before buying mixers.
Which Materials, Brands, and Finishes Make Sense in India
For sanitaryware and bathroom fittings, Indian buyers usually compare price, finish quality, spare availability, and brand reputation. Commonly trusted brands in the market include Cera, Hindware, Jaquar, and Parryware, though local availability varies by city. These brands typically offer a wide range of commodes, basins, flush systems, taps, showers, and accessories across budget and premium segments. The best choice is not always the most expensive one. It is the product line that offers consistent fittings, service support, and spare parts near your project location.
Material also matters. Chrome-plated brass fittings are still preferred for taps, angle valves, and shower systems because they usually last longer than very cheap mixed-alloy products. For accessories such as soap dishes, towel rods, robe hooks, and paper holders, both stainless steel and engineered plastic options are common. Stainless steel generally looks better and lasts longer in a wet bathroom, but a decent-quality plastic accessory can still work in a utility or rental bathroom where budget is tighter.
The bathroom environment must also be planned beyond fixtures alone. Anti-skid or anti-slip floor tiles are a better choice than glossy tiles in most bathrooms, especially for families with children or older parents. Doors should be moisture-resistant, so aluminium, UPVC, or other water-friendly options usually perform better than untreated wooden doors in wet zones. Good ventilation through a window, ventilator glass, or exhaust fan is equally important because even the best sanitary fittings will look old quickly in a damp, poorly ventilated bathroom.
- Prefer brands with visible service presence in your local market.
- Buy taps and valves in durable finishes that can handle regular cleaning.
- Use anti-skid floor tiles instead of glossy tiles in bathing areas.
- Choose bathroom doors that resist swelling, rust, and repeated moisture exposure.
- Treat ventilation and exhaust as part of bathroom performance, not as an afterthought.
How Bathroom Sanitary Fittings Are Installed Properly
Installation quality matters as much as product quality. Threaded plumbing points should be cleaned first, then sealed carefully using PTFE tape or another proper sealing method before taps, stop cocks, or mixers are tightened. This is one of the simplest but most important steps because many small bathroom leaks begin at threaded joints, not inside the wall. Over-tightening is also a mistake. It can damage threads, crack ceramic bodies in some fittings, or disturb concealed elbows inside the wall.
For commodes and basins, alignment is critical. A western commode must sit correctly over the floor outlet or wall outlet, depending on the model, and the joint should be sealed properly so foul smell and leakage do not develop later. Wash basins should be fixed at practical height and level, with waste pipe alignment checked before final tightening. In many bathrooms, the accessory stage comes after this. Soap dish, towel rod, brush holder, mirror, and hooks are usually installed by drilling the tile carefully, inserting wall plugs, and fixing screws. Random drilling without measuring can crack tiles or leave accessories at awkward heights.
Geyser, mirror, and exhaust fan placement should also be coordinated with safety and use. The mirror should not clash with the basin tap height or cabinet door. The geyser should sit where water connections are accessible and splash exposure is limited. Exhaust fans or ventilators should help remove humidity quickly. A small threshold at the bathroom entrance is also useful in many homes because it helps prevent water from flowing into the bedroom or passage during heavy use or drain blockage.
Follow this fitting checklist before calling the bathroom complete:
- All threaded tap and valve joints are sealed properly before tightening.
- WC alignment, flush operation, and drainage flow are tested after fixing.
- Basin height, waste pipe slope, and trap connection are checked.
- Shower, mixer, and health faucet points operate without visible leakage.
- Tile drilling for accessories is measured once and done carefully.
- Mirror, exhaust, and geyser positions are practical and safe.
- The bathroom threshold and floor slope prevent water spread outside.
Common Mistakes Homeowners Should Catch Before Handover
The most common mistake is buying sanitary items only by showroom appearance. A stylish tap or commode may still be the wrong fit for the bathroom point layout, maintenance conditions, or water pressure available at the site. Another frequent error is ignoring serviceability. A concealed mixer may look clean, but if cartridges, flush spares, or nozzles are hard to find locally, a small future repair becomes a frustrating exercise. This is especially true in tier-2 and tier-3 towns where not every premium line has reliable after-sales support.
Another site-level mistake is poor accessory planning. Many owners finalize towel rods, soap dishes, mirror cabinets, and jet spray points only after the basin and WC are fixed. By then, the best locations may already be blocked by the door, by a switch board, or by user movement space. In family homes across Noida, Surat, Bhopal, and Chennai, these “small” fitting errors are what make bathrooms feel cramped or inconvenient even when expensive materials were used.
Watch for these practical red flags before final payment:
- The commode is fixed, but flushing, drainage, or smell control is not tested.
- Tap joints look fine visually, but there was no proper leakage test after installation.
- Accessories are fixed at random heights without daily-use logic.
- Floor tiles are glossy and slippery in the wet zone.
- The bathroom has premium fittings but weak ventilation and no proper exhaust.
- The door, threshold, and floor slope allow water to move outside the bathroom.
If even a few of these issues remain, do not rush the handover just because the bathroom looks finished. A final functional test of every item is far more important than surface appearance. Run water through all taps, flush the WC multiple times, observe drain speed, check for vibration or movement in basin and commode, and confirm that all accessory fixing points are secure.